
Before proceeding, i would like to specify that in the event you decide to do this procedure most likely you will loose the Celestron guarantee.In case of damage to the mount the responsibility remains to whom run the procedure .This is only the story of how i run this maintenance on my own CG5-GT mount.Fai clic qui per effettuare modifiche.......
Like many amateur astronomers around the world i am an owner of this small but robust equatorial mount.All equatorial mounts suffer from a certain gear play on each axis that with time, temperature and wear can vary. The CG5 GT mount, although is well-made for its price,is certainly not an exception and the adjustment of axis gear play falls into its routine maintenance.
While a minimum clearance between the gears in RA and DEC axis can be tolerable in a visual use of the telescope, it may become a real problem in astrophotography especially in windy conditions.
In my case the gear play was featured prominently on the RA axis. It was a play of about 15-17 arc-minutes (half the diameter of the Moon) when idecided to intervene.
In the following pages i describe my attempt on the RA in order to eliminate such play.
This procedure can be followed in a similar way for the DEC axis.
I will describe only how i eliminated the gear play and therefore i will not be touching topics such as, degreasing, cleaning and refurbishing of the mount.The task of eliminating the gear play requires minor inasivity and does not require any type of cleaning or replacement of the grease.
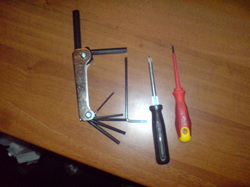
So lets start with the tools i used:
1) Allen key supplied with the mount
2) cross-head screwdrivers of various diameters.
3) (in my case) a complete set of Allen keys.(I used only the smallest for adjustment of the worm gear mesh.
Preparation:
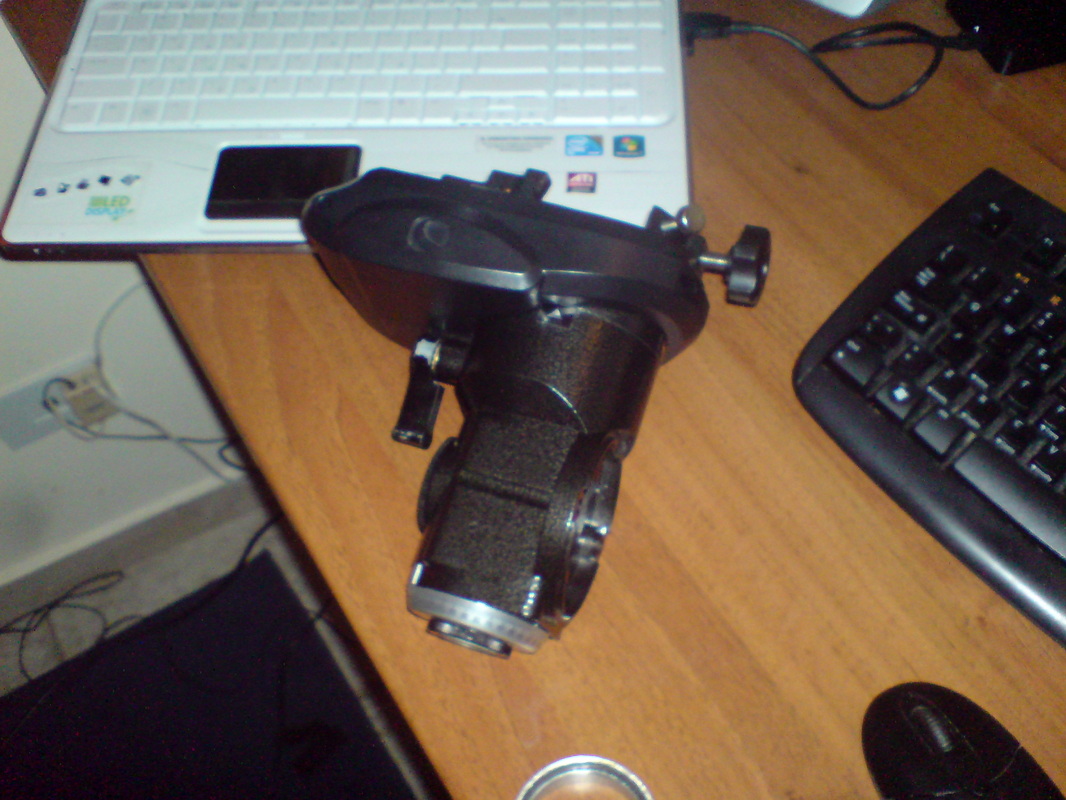
First, i removed the OTA and the cables of HC and DEC motor and separated the DEC axis from RA for more comfort during work.
To separate the DEC axis from RA I removed the plastic cover of the polar scope behind, and then I unscrewed the part where you put the polar scope,the one with the graduated circles. Once this done then I unscrewed the 2 Allen screws on the front of the mount.At this point the DEC axis can be separated safely and put on the table while the i lehft the RA on the mount so i can work on it.
(click on the pictures to view in larger size)
While a minimum clearance between the gears in RA and DEC axis can be tolerable in a visual use of the telescope, it may become a real problem in astrophotography especially in windy conditions.
In my case the gear play was featured prominently on the RA axis. It was a play of about 15-17 arc-minutes (half the diameter of the Moon) when idecided to intervene.
In the following pages i describe my attempt on the RA in order to eliminate such play.
This procedure can be followed in a similar way for the DEC axis.
I will describe only how i eliminated the gear play and therefore i will not be touching topics such as, degreasing, cleaning and refurbishing of the mount.The task of eliminating the gear play requires minor inasivity and does not require any type of cleaning or replacement of the grease.
So lets start with the tools i used:
1) Allen key supplied with the mount
2) cross-head screwdrivers of various diameters.
3) (in my case) a complete set of Allen keys.(I used only the smallest for adjustment of the worm gear mesh.
Preparation:
First, i removed the OTA and the cables of HC and DEC motor and separated the DEC axis from RA for more comfort during work.
To separate the DEC axis from RA I removed the plastic cover of the polar scope behind, and then I unscrewed the part where you put the polar scope,the one with the graduated circles. Once this done then I unscrewed the 2 Allen screws on the front of the mount.At this point the DEC axis can be separated safely and put on the table while the i lehft the RA on the mount so i can work on it.
(click on the pictures to view in larger size)
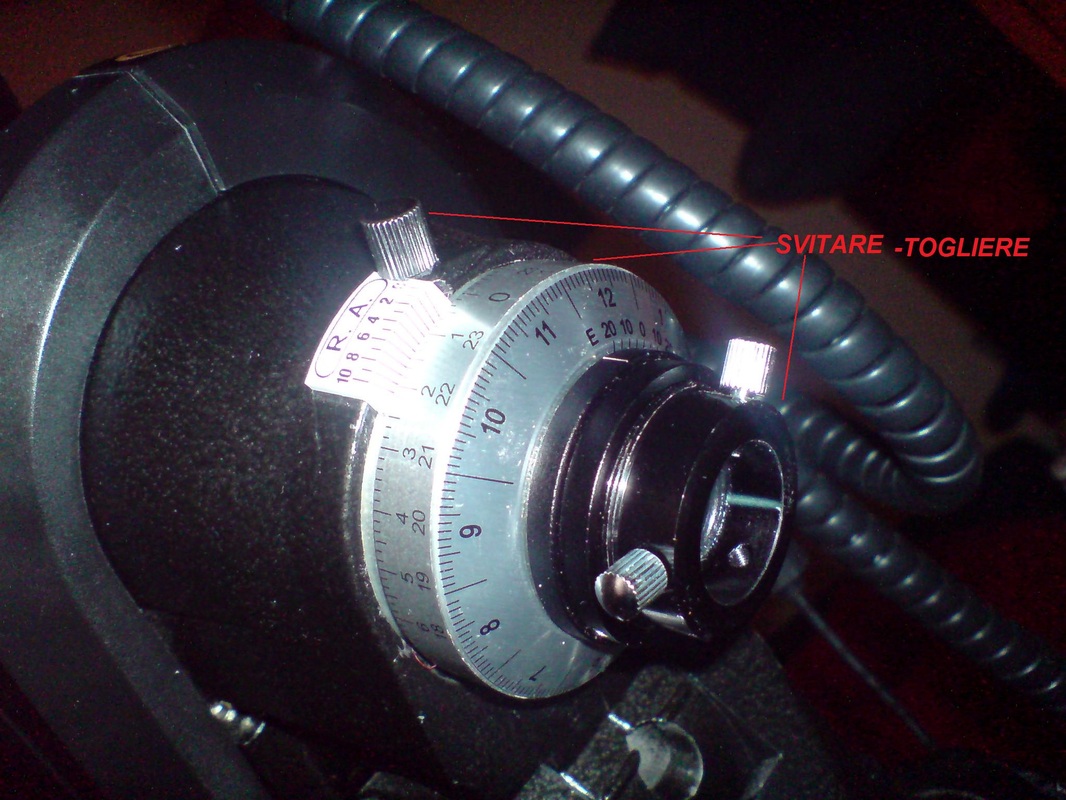
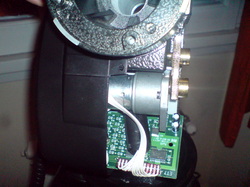
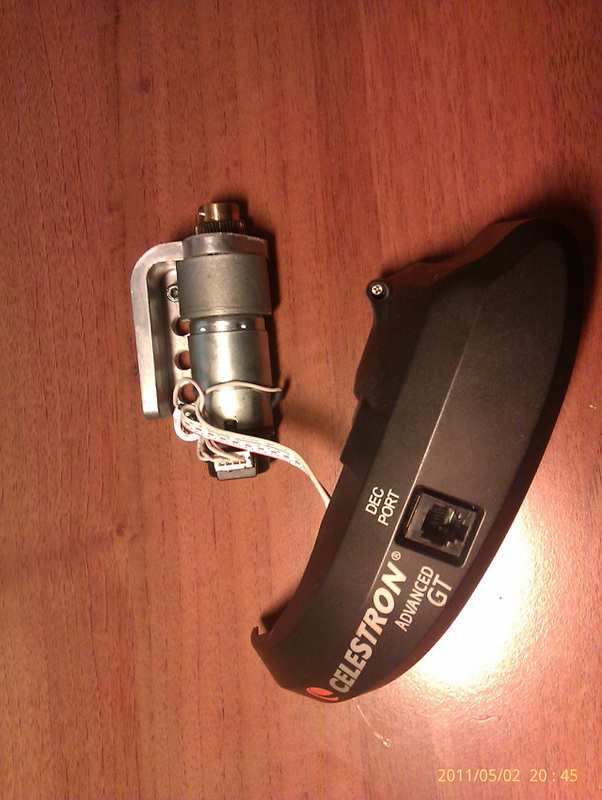
At this point, having only the RA axis on the mount, i unscrewed the altidute knobs ,so i could have a free access and a more convenient one to the next screws. Then I unscrewed the screws that hold the plastic shell of engine RA:the one behind, in front ,the one with the plastic safe ,which i also removed, and then the front bottom one that holds the two pieces together.From here you can separate a part of the shell completely (the one that doesn't has above the RJ and DC ports, while the other i left it as is because it is linked with RA and electronic boards.
My goal was to have access on the regulation of worm and worm gear shaft RA
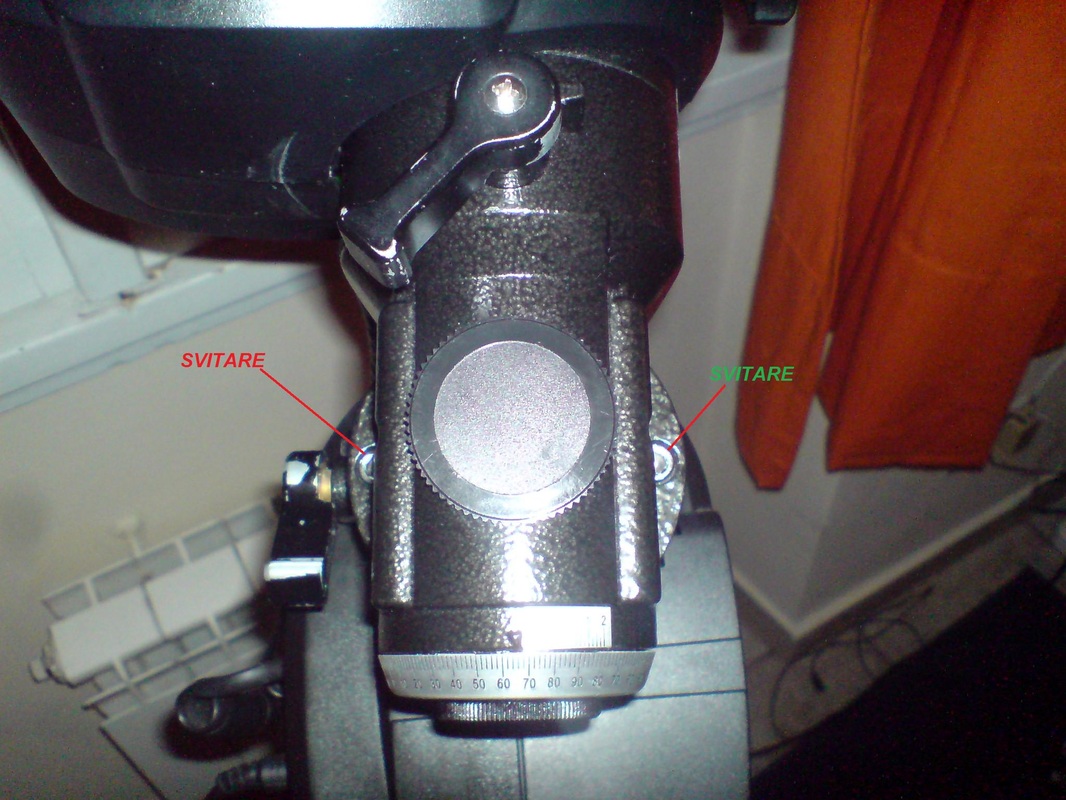
Then I had to remove even the other part, together with the motor and the boards.Nothing easier than that, just unscrew the Allen screw from the rear end of the mount axis with attention 'cause once unscrewed isfree from detaching. Here's the screw:
(click on the pictures for viewing a larger version)
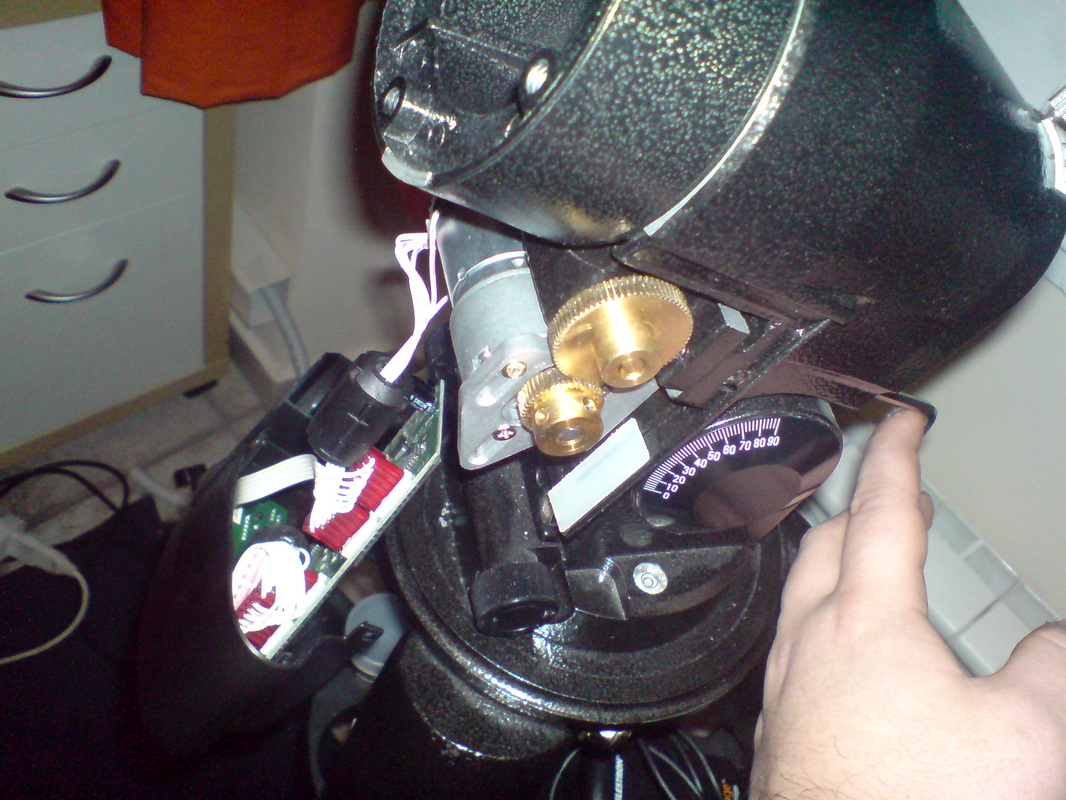
Once removed everything this was the result:
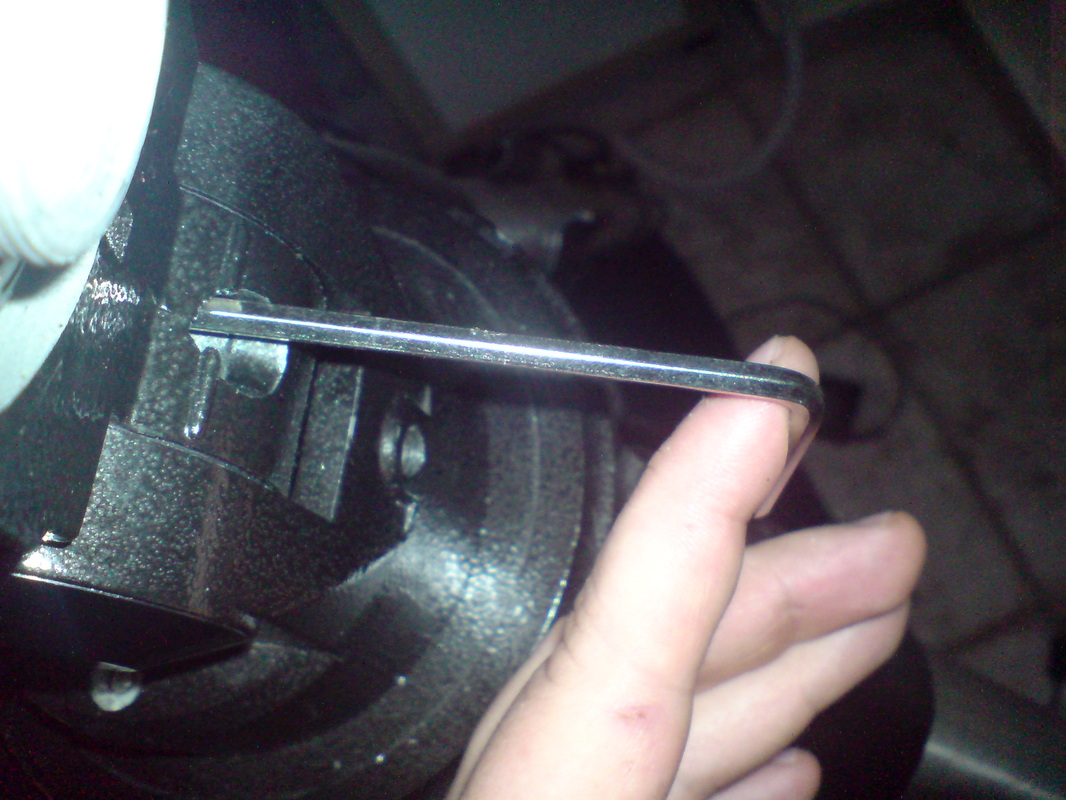
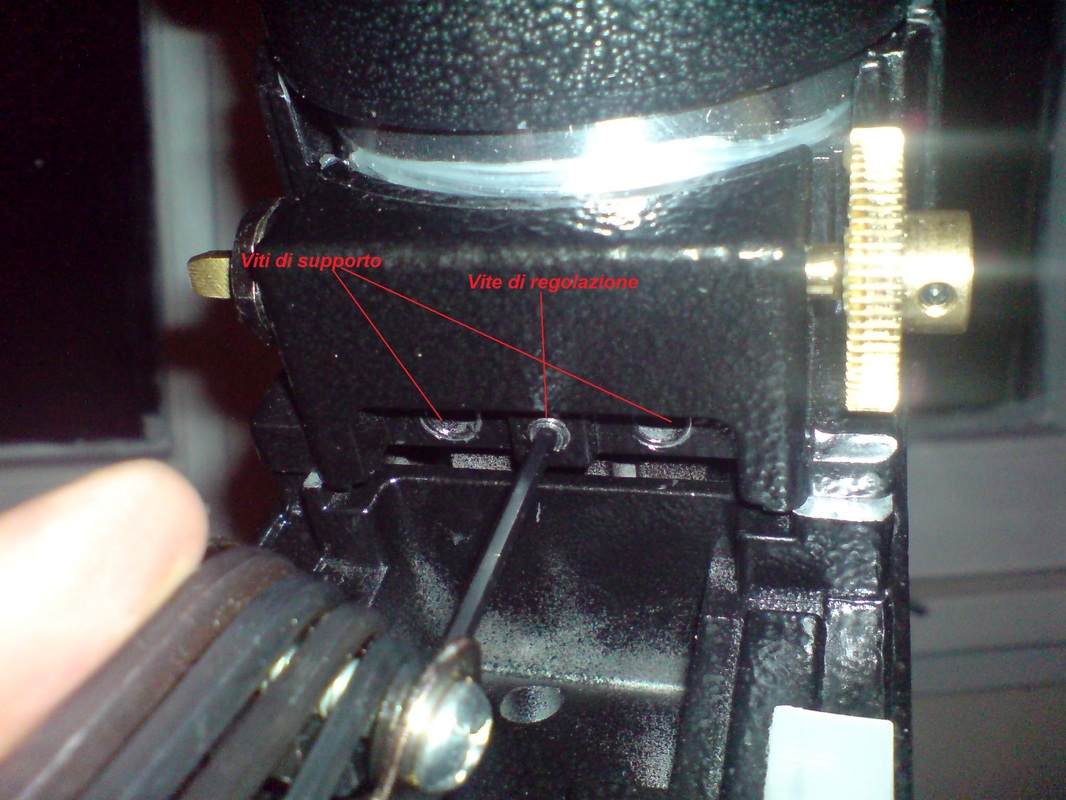
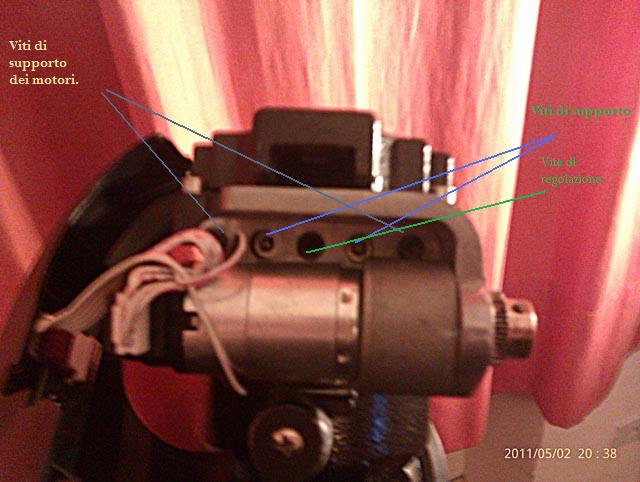
The adjustment screw must absolutely not be removed while the Allen support screws is enough to unscrew them slightly.I had them removed to understand but is enough lessening them by 2-3 rounds.Arrived at this point I loosened a bit the other 2 screws that hold together the shell of the RA worm gear block ,one on the right and on the left ,as shown on the picture below, because the gear play was so big that i had to move the block closer to the alluminum crown..
Here is the position:
Here is the position:
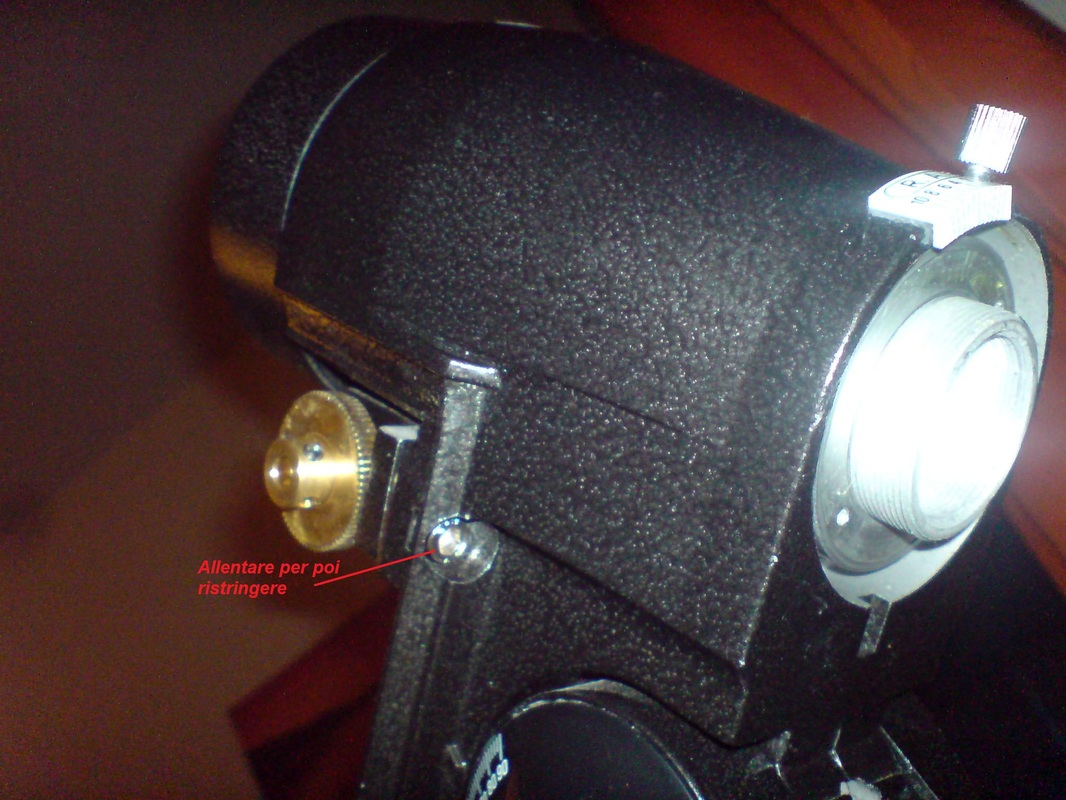
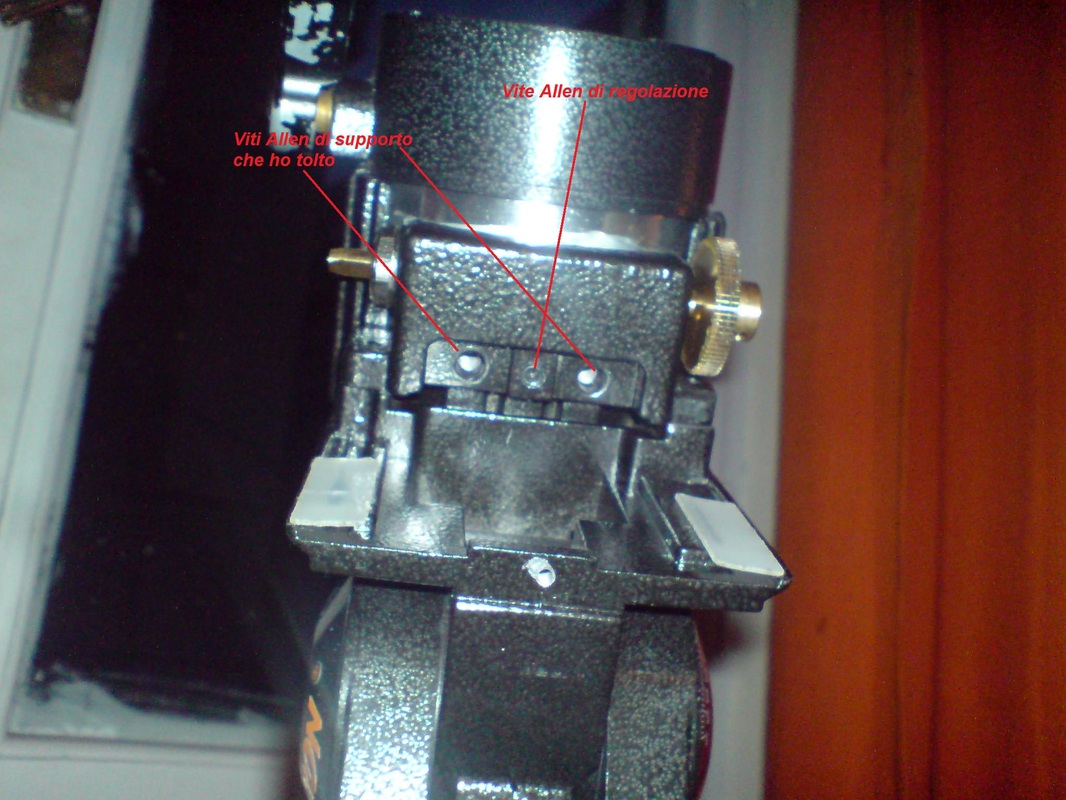
At this point you have to do a job of trial and error for the gear mesh by tightening and loosening the screws both that support the worm gear block and the adjustment one in the midle.One thing to remember. More you loosen the adjustment screw then you eliminate the gear play (or backlash) but you also tighten the axis becoming more ' hard once you tight the screws.
So by tightening the adjustment screw (clockwise motion), increases the distance between worm-gear and the “Crown “.
and loosens the grip so the gear play increases ... and the oposite.
The important thing is finding the right compromise between hardness and lack of gear play
.
It's not difficult at all it just needs patience. I managed to eliminate all of the gear play and the axis is softer than before
Here's the photo where I act on the adjustment screw:
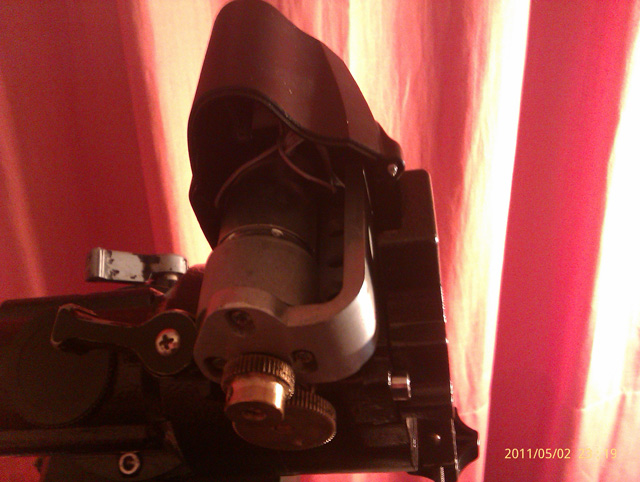
Once found out the right compromise ... i tightened even the support screws (which are absent in the picture) to replace everything as it was.
Then:) I put the motor block back and locked it into place with the only screw Allen that keeps it there from behind.
B) I closed the plastic shell of RA, put screws back by and paying attention to cables and adapters.
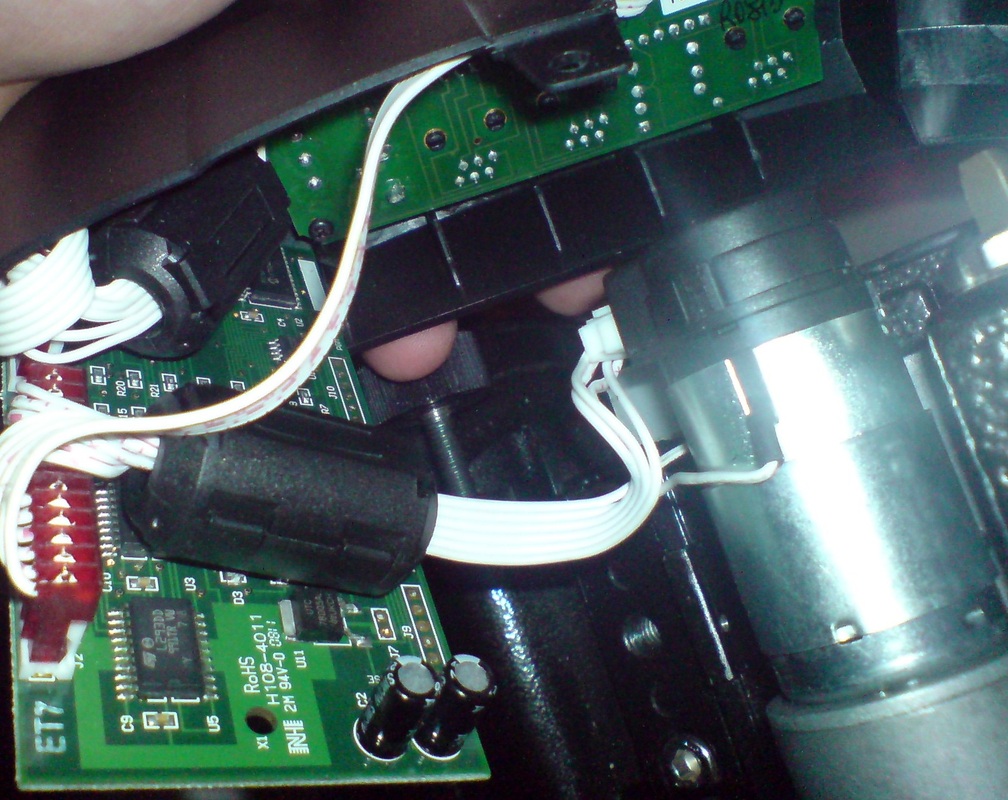
I include a picture where you see the position of the electronic boards inside the shell.The positions are symmetric with the other shell and there are proper channels where you insert boards.
Then:) I put the motor block back and locked it into place with the only screw Allen that keeps it there from behind.
B) I closed the plastic shell of RA, put screws back by and paying attention to cables and adapters.
I include a picture where you see the position of the electronic boards inside the shell.The positions are symmetric with the other shell and there are proper channels where you insert boards.
The result was a mount without gear play or noticeable backlash and even softer on the axis than before.I believe that this operation ,which is easy,once you found the right compromise between gear play and hardnes, it's the one that has most impact on the hardness of DEC and RA axis.
According my opinion replacing the grease definitely affects morbidity but not as significantly as this procedure ,and must be done so, only when absolutely necessary.
From what I managed to see the factory grease was enough and of decent quality.
For the DEC axis, the steps to follow are virtually identical in cases that we need to intervene.
I post the photos of the dec axis parts for your convenience: (click to enlarge)
hope that this explanation of how I did it I can be of help to those who need to intervene on the mount for eliminating the gear play. Nevertheless i do not recomend it unless you have some familiarity with tools and electronic parts, and of course is not reccomended to those who have the mount under warranty.
I ask sorry for any grammatical and expression mistakes.
Clear Skies,
Michael Xyntaris
I ask sorry for any grammatical and expression mistakes.
Clear Skies,
Michael Xyntaris
 RSS Feed
